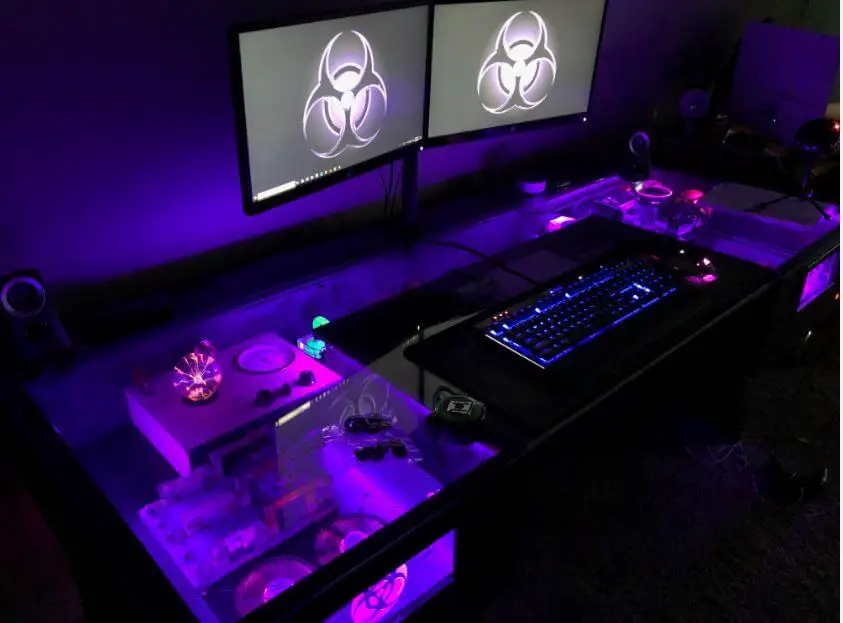
Admit it. It’s enticing. The thought of a custom-made desk that houses those sexy PC components under a slick glass top. Add to that RGB lighting goodness, simple upgrades, and expandability, and you have a recipe for a drool-worthy creation that you can build yourself and own the “coolest PC setup” title amongst your friends and neighbors for years to come.
And you can absolutely do it. But how do you build a DIY desk pc?
There are 15 basic steps to building your own desk PC case.
- Step 1 – Design your dream workstation
- Step 2 – Choose your building material
- Step 3 – Calculate measurements
- Step 4 – Gather your tools
- Step 5 – Check and double check your measurements
- Step 6 – Cut out each piece for the desk assembly
- Step 7 – Dry fit the build to make sure everything is square and level
- Step 8 – Sand the pieces to get them paint or stain ready
- Step 9 – glue and nail the final build together
- Step 10 – Measure for and order glass
- Step 11 – Paint the desk shell
- Step 12 – Mount computer hardware
- Step 13 – Route and manage cables
- Step 14 – Add LED lighting
- Step 15 -Apply glass and power it up!
Let’s explore each of these steps based on a recent build my son and I created and see if we can get you started on designing and building your own custom Desk PC Case.
Step 1 – Design your dream workstation!
First of all, you don’t need 3D modeling software or any special training to do this. We just need to make a few decisions and draw it out with plain old paper and pencil. To help with the measurements and dimensions, you can print free graph paper from printfreegraphpaper.com.
What will the general design shape be? Will you build a basic rectangular desk or do you want to include a knee cutout to allow for improved legroom? We went the knee cutout route but this is really up to you and what you think will be a more comfortable workspace for you.
Next, what will the dimensions be? Common desk size is around 60 inches wide, 30 inches deep, and 30 inches tall. You should customize this to your preference but these are general guidelines. See the previous post on the best dimensions for a Desk PC for further guidance.
You’ll also need to decide on what will be the dimensions of the glass top? This may seem obvious as you might be inclined to assume that the dimensions of the glass top will be the same as the overall desk dimensions but first you may want to entertain these considerations.
- If you’d like to incorporate some unique built-in accessories like a flush mount Amazon echo or a hidden wireless phone charger then you will need a wooden surface for at least part of the desk.
- If you would like the option of mounting your monitor(s) to the desk instead of having them sit on top it is easier and safer to mount them to wood than to glass.
- Those cables coming out of the back of the motherboard and graphics card have to be routed out the back and if those components are flush with the back you won’t be able to push the desk all the way to the wall.
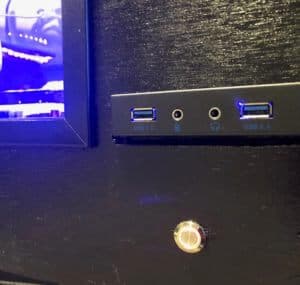
You will want to ensure that you have a power button in an accessible location. We researched a lot of these and finally settled on the KNACRO model on Amazon as we liked the idea of drilling a hole through the front panel and being able to screw it into place so that we had a true custom look (there are pictures later in this article).
What about front mount I/O ports such as USB 3.0 and mic/headphone jacks? We found an inexpensive one on Amazon for our build (you’ll see it further down). You should consider whether or not you want this feature now.
Finally, you’ll need to determine what approach you will take for the legs. There are plenty of prebuilt desk leg sets on Amazon that you can consider but we chose to build our own. An interesting solution might be to utilize a sitting/standing adjustable height desk stand. However you choose to approach this, you’ll want to decide on a solution so that you can plan that into your build.
Have a look at some of my design posts for ideas and considerations.
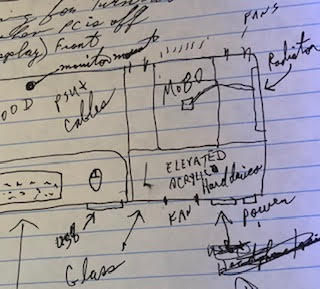
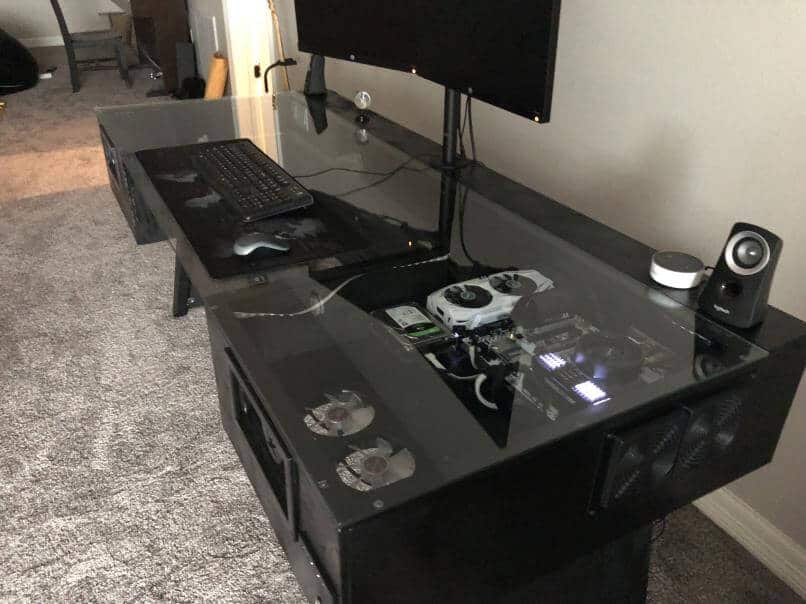
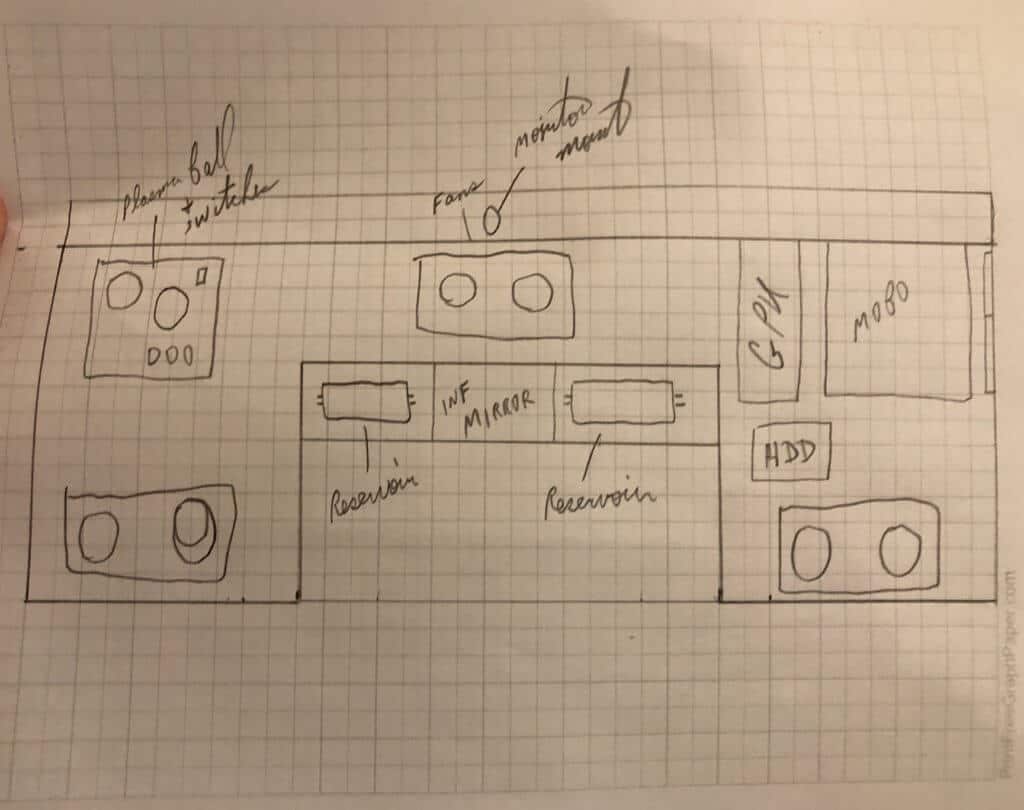
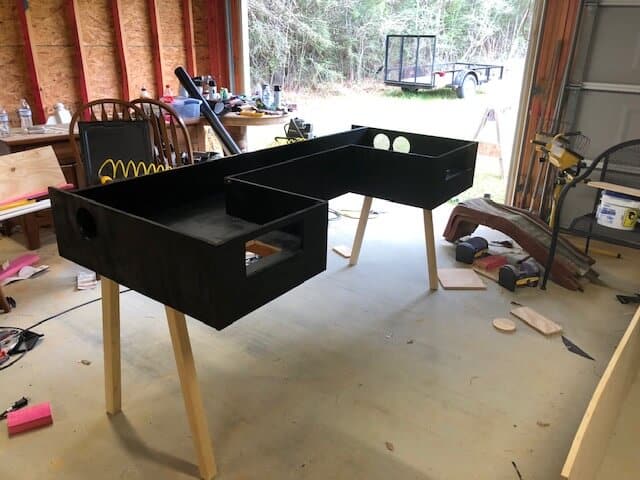
Here’s what we did.
I planned for our glass top to be 5.5 inches shorter than the depth of the case. This allowed me to cut a 1X6 and mount it on the top along the back. We also built a false back on the inside of the case under that 1X6 board. This created a large pocket in the back of the case that allows for tons of cable routing and management as well as a surface to mount our dual monitors and (eventually) our Amazon Echo. It’s a clean look and you would never know that there is a mangled pile of wires running back there.
That’s not to say we didn’t make a big mistake with our glass fit. Trust me on this one, don’t order your glass top until you get to that step in the process!
Next is airflow. How will air circulate through your build? You’ll want to ensure that cool filtered air is being pulled in and warm air exhausted. I’ve written previously on the challenges we faced with this. What I recommend is, to the extent possible, a straight path between intake and exhaust. If you are going to pull air in from the front then exhaust out the back. If your intake fans will be on the side, exhaust out the other side. There’s a lot of debate out there about airflow but that’s what I recommend. We didn’t do this and it was quite the challenge to balance it all out.
Read this post for more information on creating an efficient airflow design.
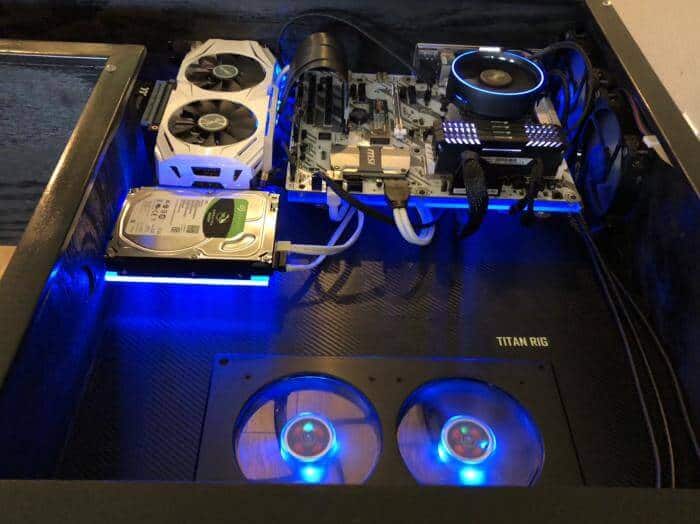
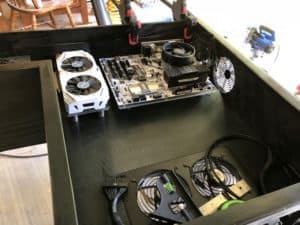
With airflow figured out, let’s decide where the components will be mounted. The largest of these is the motherboard and the graphics card. You can install the GPU directly into the motherboard like you would in a typical desktop case build or you may want to use an extension cable and mount it next to it. We did this using a Thermaltake 300mm extension cable. Click here to check the latest prices on Amazon. This is a creative design preference but something you will need to decide on.
You’ll also have any number of hard drives depending on your motherboard’s capability and your budget. These need to be relatively close to the motherboard so map that out. (Have a look at my post on Best Practices and see the section regarding component proximity to the motherboard and why it matters).
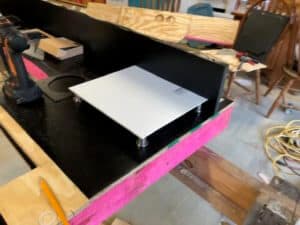
Finally, consider how you will route your cables. We decided to elevate the motherboard, GPU, and hard drive on sheets of frosted acrylic using some stainless steel standoffs that are usually used for mounting signs. We found these on Amazon.
If you plan to incorporate liquid cooling, you’ll want to account for mounting of reservoirs, radiators, and pumps but those are not as difficult as they can be placed on the opposite side of the system away from the motherboard. Still, think about how those components will be installed.
Here’s the final draft we came up with for how our system would look and the planned dimensions.
Step 2 – Choose your building material
There are arguments for and against metal vs. wood for a DIY Desk PC case build. Unless you are skilled at working with metal, I’m a strong advocate for wood. It’s easy to cut and easy to assemble. If you have the skills and tools to build using metal, go for it. Otherwise, a wooden case works great.
Now, if you are building with wood there is still a question of what type of wood you will build with. There are nice furniture grade woods, plain old plywood, or MDF. We chose plywood for our first build but MFD offers appeal as it is generally very straight and has a very smooth and consistent surface pattern. (Read my post on MDF vs. Plywood for a desk PC build for more information.) This makes for easier painting or, if you want to do what we did, apply a carbon fiber pattern vinyl wrap to the inside bottom of the desk. We went with the VViViD XPO Black Carbon Fiber model because it had a significant number of reviews and the majority of those were positive. It was not the cheapest brand but I wanted to ensure quality for this aspect of the build because once I installed the PC components I didn’t want to have to worry about having to pull them out to deal with the vinyl wrap starting to roll up on the corners or lose adhesion.
There are some cautions that you need to keep in mind when working with MDF, particularly with the need to work in a well-ventilated area and to keep it away from moisture but there’s absolutely no reason you can’t use it if you want. Heck, you don’t even have to stay with a single material. You could build the bottom with MDF and use a furniture-grade wood for the side panels. This is your desk. Build it your way!
Step 3 – Calculate materials then it’s off to the hardware store
It’s time for us to determine what we’ll need for this build, minus the computer hardware.
Here’s a quick list of what we used:
- Wood – 1 or 2 sheets of 4X8 wood of your choice.
- 8-foot furniture grade 1X4 – (I think we used birch because that was what was available at our local store).
- Two 8 foot 2X2’s – (These were used to build and brace the legs and add strength to them)
- Two 8 foot 2X4’s = (Not required depending on your build – we chose to line the underside of the bottom plate with these for strength and to accommodate mounting of sides of the desk.
- Metal corner brackets – I highly recommend these as they ensure a sturdy build and help to keep the frame square when transporting. We used about a dozen of these for the inside of the desk and the leg frames.
- ½ inch screws – These are used to secure the corner brackets to the desk.
- ¾ inch trim – We used this to outline the top of the side panels. It not only hid the unfinished sides of the wood but allowed us to mount LED lights facing down into the system that was mostly hidden from view. You’ll probably need 8-12 foot of material depending on your build design.
- Sandpaper – you’ll want some rougher 80 grit or so and some fine 220 grit.
- Paint or stain – (depending on how you plan to finish your build.)
If you live relatively close to a hardware store, don’t fret over getting everything all at once. We made several trips as we learned what we needed and made decisions on the way. Grab the stuff you’ll need to get started and we will go from there.
There are ways to be creative with the desk design so that you only need one sheet 4X8 sheet of wood but my advice to you is to not skimp on design just to meet this goal. If it takes buying an extra sheet of plywood or MDF to build the desk PC case of your dreams you are only talking another $20-$30. Don’t try to get by with less material on designing the desk for such meager savings. The fact that you are building the desk yourself is already saving you tons of money over buying a manufactured desk PC case.
Step 4 – Gather your tools

With your materials onsite it is time to get to work. See my list of Recommended Tools for my recommendations on low-cost Amazon solutions to any of these that you do not have. A few essential tools you will need include:
- Tape measure
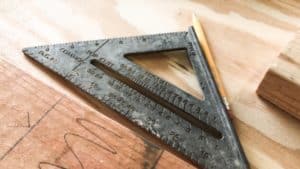
- Framing Square or speed square
- Electric screwdriver
- Electric drill
- Skill saw
- Wood glue
- Jigsaw
- Safety Goggles
Additional recommended tools that can make the build process go a little easier include:
- Table saw
- Miter saw
- Finish Nailer (I prefer to use a pin nailer style finish nailer.)
- Drill press
- Electric sander
- Clamps
If you don’t have these recommended tools you can still build a desk PC case but you’ll need to spend a little more time getting your cuts straight and securing your build. Although these are recommended don’t decide that you are not going to build one just because you don’t have these tools. Commit and follow through!
Step 5 – Measure twice, cut once
Here’s where we begin to really see that the devil is in the details. The key to a successful build is accurate measuring and precise cutting. Let’s start with the largest part of the build, the desk bottom.
Begin by measuring in from one of the wide sides toward the center and mark the depth of your desk. Next, repeat this step for the opposite end of the board, then repeat in the middle.
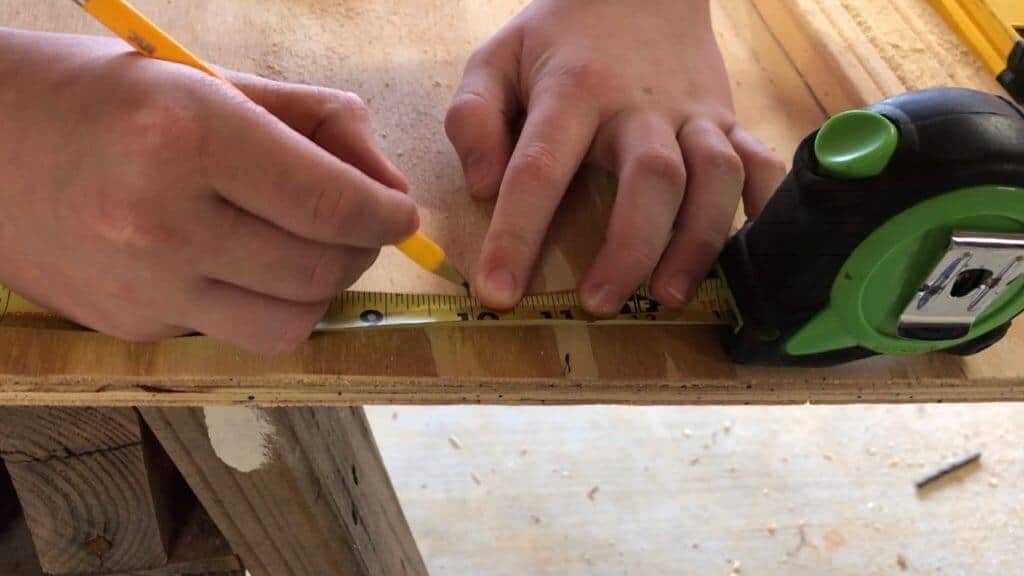
With these areas marked, take something with a straight edge that is at least as long as the board and line the edge up with the marks. Holding the straight edge firmly in place, draw a line down the length of the straight edge, tracing against the edge, to give you a complete cut line.
Do the same for the sides of the desk, measuring from one side edge to determine the width and mark it. Do this for every cut you will be making. You’ll then want to go through the same process for the back and front panels. The inner height of the desk where the computer components will be installed can be customized to your preference but generally speaking, you want to make sure that it will accommodate the tallest part of your build. For us, this was 120mm fans that would be installed on the sides of the desk but we were mounting our graphics card horizontally next to the motherboard using an extension cable. If you plan to mount the graphics card directly to the motherboard, it will stand vertical and likely increase the depth requirement.
Take your time to trace out all cut lines for each piece of the build. For good measure, go back and double check your measurements to ensure that there are no errors.
For the legs, you’ll need to look at the design that you decided on. We chose a basic triangular shape that tapers wider at the bottom. This was my son’s preference. Whatever design shape you chose, trace that out now using the same approach as above (unless you are ordering pre-built desk legs).
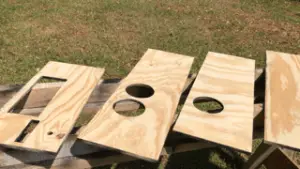
Step 6 – Let the cutting begin!
If there is one part of this building process that will make your heart flutter with nervous trepidation, it’s the cutting process. This is where the time you invested in measuring could be ruined if you make a mistake.
Don’t stress. Just focus.
The order in which you cut your desk pieces matters. You may want to review the post In what order should I cut my desk pieces but basically, I recommend beginning with the bottom plate, then the sides, the back, and finally the front panels.
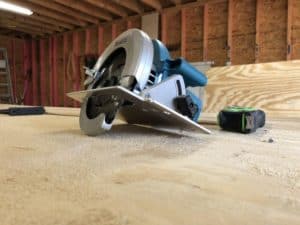
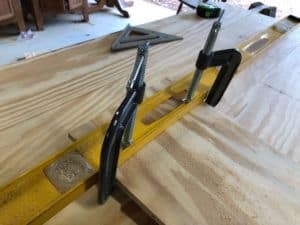
When cutting with a skill saw, a great tip is to use a straight edge as a cutting guide that you saw can glide against as it cuts which helps to keep the cut line straight. There are tools designed specifically for this that actually attach to your skill saw to ensure that your cut stays true but at the time we didn’t have one of these so we used a couple of approaches. For the long cuts, we used a piece to crown molding that we braced to the plywood with wood clamps.

This worked okay but since it was only braced at each end I had to hold pressure against it as we cut through the middle section to keep the guide edge of the saw from sliding underneath it. For shorter cuts, I used a 4-foot metal level which we braced with clamps similarly to how we’d done the molding. It worked much better.
The goal here is to keep your cut line straight. It may seem easy to eyeball it and just follow the trace-line with your blade but it’s easy to get off the line. A better solution is to use a saw track to ensure your cut is clean, straight, and true.
Depending on your design, you may want to consider securing 2X4’s or 2X2’s along the underside edges of the bottom piece of the desk. We chose to do this for two reasons. First, it would increase the strength of the build and second it would allow a larger surface for us to secure the sides. I’ve seen others glue the sides onto the top of the bottom plate along the edges and that is okay but our approach was to build a skirt around the desk bottom that would allow about two inches of hidden space under the desk for cable and liquid tubing management. Again, this is a design preference. Make it look the way you want it to.
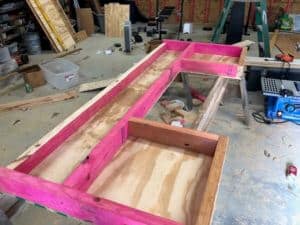
Notice how the board at the inside of the knee cutout spans the width of the desk? We didn’t do it this way initially and had problems with the desk wanting to sag in the middle, just one of the mistakes we made during our build.
You’ll also want to consider holes and slots for your motherboard and graphics card I/O, fans, and routes for cables. If you are liquid cooling you’ll also need to account for any holes necessary for routing tubing. This all depends tremendously on your specific build but let me share just a few tips from our experience with this.
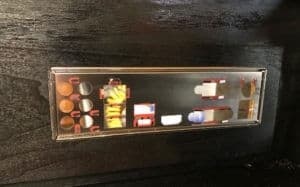
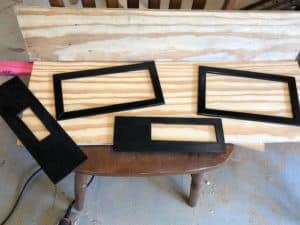
For the motherboard’s I/O port slot, I just took a thin 1/4″ sheet of birch wood and traced a cutout line using the I/O plate that comes with the motherboard as a template. I then, very carefully, cut out that hole just inside the trace line so that the hole was slightly smaller than the plate. On the same board, I also cut out the graphics card I/O slot. We were then able to cut a larger hole in the actual back of the case and wiggle the thin I/O port board around as we mounted the motherboard and graphics card to get just the right fit. The cutout for the motherboard’s I/O plate ended up fitting so well that the plate actually presses in and holds in place similar to how it would in the back and a regular PC case. Pretty sweet!
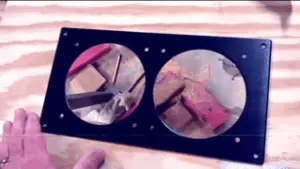
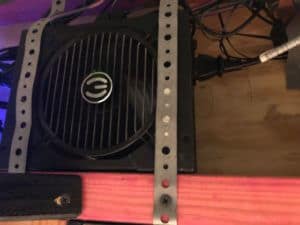
We approached fan holes with two different methods. When there were two fans side by side we chose to cut out a rectangle just big enough for the fans to fit through since we were going to be covering those with these cool metal plate covers anyway.
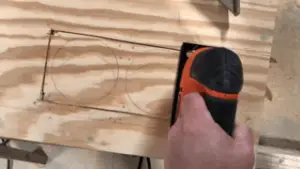
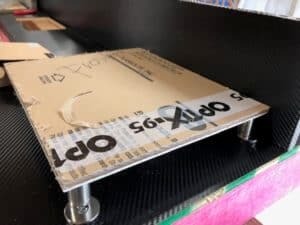
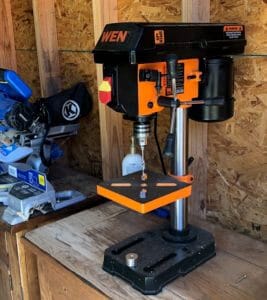
When it was just one fan, however, or two fans that weren’t sitting flush against each other, we used a hole saw to ensure a clean, perfectly round hole exactly the size we needed. You can do this by hand with a drill but I highly recommend a small, inexpensive drill press for this. There is an amazing amount of torque produced when using a hole saw and I have had my wrist twisted and my knuckles busted more times than I can count while cutting holes in my attic and walls. A drill press ensures a clean, even cut and just makes this whole process go more smoothly. You don’t have to spend a fortune on one. We bought a WEN drill press off of Amazon and it works great. You can click here for the latest price on this drill press.
As for cable routing, we got really creative with this one. I chose to cut a hole under the motherboard itself and then elevate the motherboard off the bottom using a sheet of acrylic and some stainless sign standoff posts like I mentioned earlier. Don’t be afraid to get creative with cable routing. In fact, embrace finding creative solutions. Our approach worked out great with the cables from the motherboard wrapping underneath it and disappearing from view, routed discreetly out of the case to the bottom where we mounted our power supply.
We liked the look of the elevated motherboard so much that we ended up elevating the GPU and the hard drive as well. Once we added the LED lighting into our system, those sheets of frosted acrylic really shined and turned out to be one of the showcase points of our build.
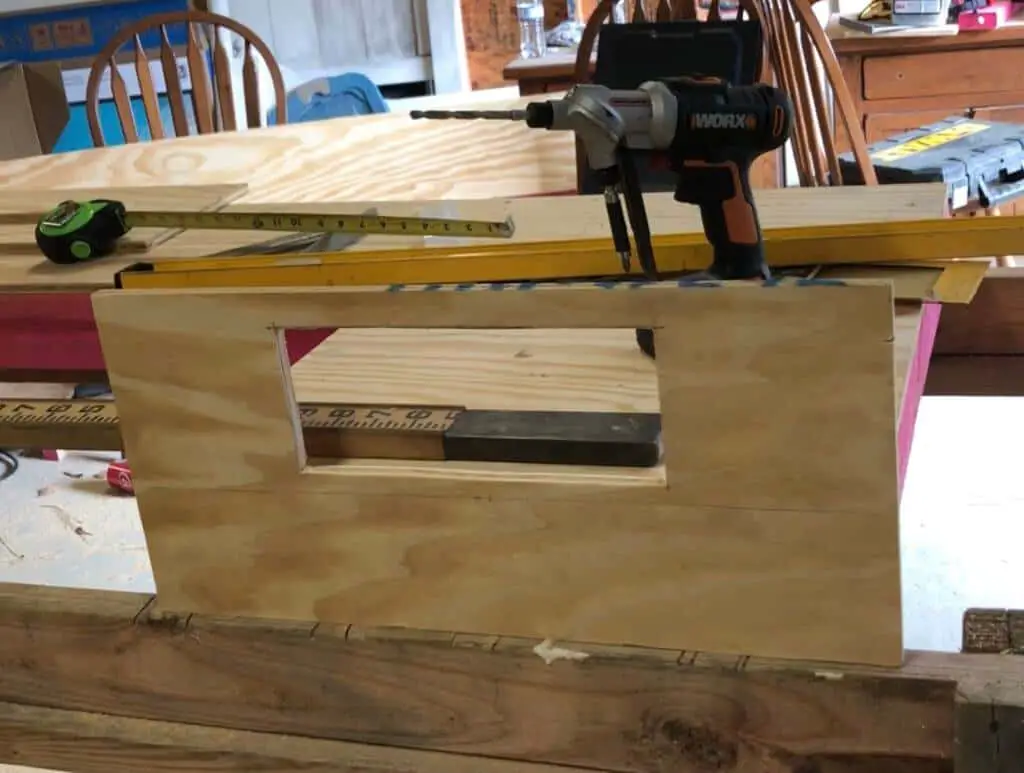
The front panel I/O port just required a rectangular hole which I cut with a jigsaw. The I/O port has a small rim around it so we ended up with a nice clean look. The power button was a simple matter of drilling a hole just large enough for the threaded part to fit through then securing it from the back with the included nut. Hand tightening was all that was needed and it fits flush on the front panel.
The one thing I wish I would have done differently here is when I cut the holes and planned it so that the ports were flush with the top of the inside bottom plate. If I had put it lower next to the power button I could have run those cables under the desk and not had them inside. Live and learn.
Step 7 – Dry fit to ensure everything fits together as it should
Once you have the bottom and sides cut out, it’s time to do a quick dry fit of all pieces (minus the legs) to make sure that your cuts have no errors. What I mean by dry fit is that we are not actually securing the sides to the desk bottom with glue or finish nails. We are just going to use stuff we have lying around to hold them in place so that we can make sure the build is square and level.
Step 8 – Sand, Baby, Sand!
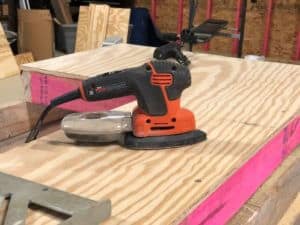
You can certainly do this by hand, but I’m a big believer in making use of tools that make the job easier. Sanding isn’t fun but its an absolute necessity in getting your desk parts ready to paint. Just take your time and go over each piece carefully, starting with a heavier grain sandpaper if you need to but finishing it off with a fine 220 or so grit. You’ll appreciate the time you spent on this part later.
It sucks but just do it.
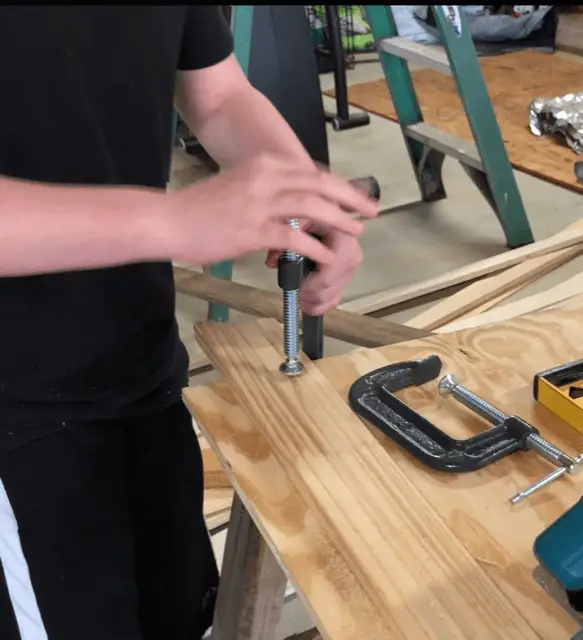
Step 9 – Glue, screw, and nail
Now that we have ensured a good fit that is square and level, (you didn’t skip this part did you?), it’s time to start putting this baby together! Exciting, right?
I recommend starting with the side and front panels. I used a speed square and framing square again for this as I was gluing these on to make certain that I had a true 90-degree angle at the corners and that the panels were standing true at 90 degrees.
Some builders use only glue to secure the side panels. I prefer to use a 23 gauge pin finish nailer to tack them in place. 23 gauge pin nailers leave very small, almost unnoticeable holes that can be filled and sanded quickly and easily. They are so small in fact that you don’t even have to fill and sand them if you don’t want to. If you have an air compressor, you can usually purchase a 23 gauge pin nailer on Amazon for less than $30. Battery powered nailers are more expensive but they do offer the additional benefit of not being tied to an air compressor.
Whatever route you choose in securing the side panels, there is one tip I want to encourage you to consider when it comes to the corners and that is the use of small metal corner brackets at the top corners where the side panels meet. They really pull the corners tight and hold the build solid. We used ½” screws to secure these and placed them right at the top corners. Once we applied the ¾” trim along the top edge (more on that shortly) they are barely noticeable unless you lean down and look for them.
Step 10 – Obtain final measurements and order glass
Now that you have your desk assembled, do some quick measurements to ensure one last time that it is square and level. Once you are comfortable with the dimensions, it’s finally time to get the official measurements for your glass. This is as easy as measuring the width and depth of the desktop, again always double checking each end and the middle to ensure they are the same.
We ordered our glass from a local glass shop that repairs windows, etc. A custom cut ¼” thick non-tempered clear glass sheet for our desktop was around $70. Although we went with a non-tempered glass, you should really consider tempered glass for your build.
See the post Best Practices in Building a DIY Desk PC Case for more details on tempered vs. non-tempered glass.
Step 11 – Paint that puppy!
While your glass is being cut, let’s get to work on the painting. We used a basic high gloss black spray paint for our desk PC case build but there are a ton of options out there. Know that it’ll take two or more coats as the wood soaks up the paint. It’s at this stage that you are really going to start seeing the beauty of what you have built.
Just as a side note, we didn’t paint the underside of the desk or the back that is against the wall. It just didn’t seem necessary at the time. However, looking back, I should have just done it. It would have given it a more finished look for the rare occasion when someone is under the desk.
When the painting is done it is a good idea to go over the entire build with a couple of coats of polyurethane. Generally it is recommended that you sand lightly between coats. It’ll give the desk a nice shine and help protect it at the same time.
Step 12 – Mount your hardware
So here we are… your desk is built. Your glass is ordered, maybe it’s already arrived. All that’s left then, is turning this desk into a working computer.
If you have planned your build out well, this will go fairly smooth. Everything already has a place. All you have to do is start mounting.
I won’t go into the detail of connecting computer parts here. There are a gazillion YouTube videos on this and though we are building in a desk instead of a traditional case, the process of connecting the various components together is essentially the same.
Step 13 – Route and manage your cables
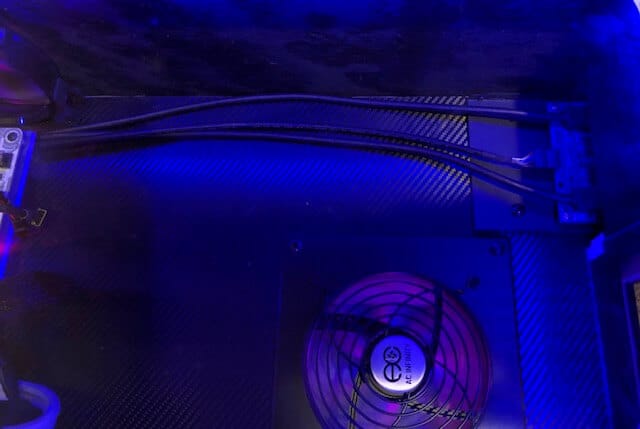
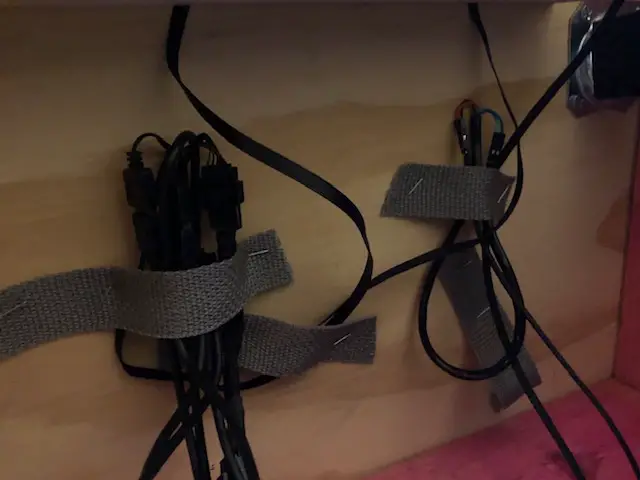
I want you to take your time with this step. Yes, you are very close and I know you are anxious to fire your new system up but the hallmark of a clean system design lies in cable management. Depending on how you decided to route your cables during the design phase you will want to group them together and run them directly out of the system or to the component that the terminate in as straight of a line as possible. A great tip for managing cables inside the system is the use of Velcro straps that you wrap around the bundle of cables to keep them together. Since our cables were managed on the underside of the desk, we simply bundled them and stapled pieces of some old straps to the desk to hold the cables in place. You can purchase straps like these very inexpensively on Amazon.
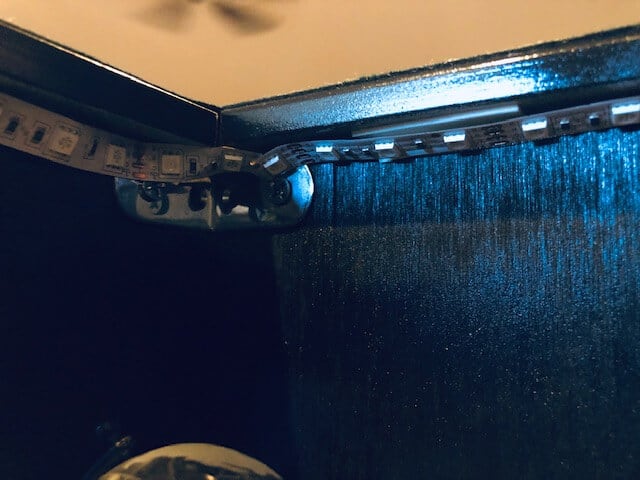
Step 14- Add some LED goodness
While you are routing cables, this is an excellent time to add an LED strip to the underside of the ¾ inch trim going around the top of your case if you chose to add it. While most LED strips come with a sticky surface intended for this purpose, they are not actually designed to stick to wood and we noticed the strips starting to hang after a few days. Super glue resolves this issue once and for all. For a less permanent solution, hot glue is fantastic. The two-sided tape that college students often use to hang pictures on dorm room walls also works very well.
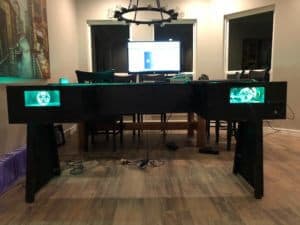
Step 15 – Add Glass and Power it up!
I actually recommend you power your system up and test it before adding the glass top just to make sure everything is connected and working as intended. Regardless, this is the moment you have been waiting for – when you finally see your creation, something you conceptualized and created, come into being. When you press the power button and see life come to your system for the first time, it’s a beauty to behold.

You’ve got it from here. Enjoy your new build and share your journey and creation with others by sending pics and links of your YouTube videos to me so that others can be inspired by your new Desk PC.
Author’s Note: I’m preparing a complete video series that will walk you through every step of this process from Design to completion. Stay tuned!