When you are building a Desk PC, there is no sense in investing in expensive tools unless you are planning to make a career for yourself in Woodworking. That being said, there are a few essential tools that you will need in order to build the desk. Below I have outlined what I consider to be the essential tools as well as some that not essential but are recommended in order to make the job easier in some cases and to provide a more professional looking finished product.
I’ve provided links to Amazon for current pricing to each of these. My recommendations are based on a mixture of pricing, features, reliability, and in some cases my personal experience in working with them.
Essential Tools
Tape Measure
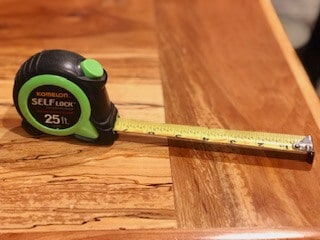
If there is one tool that you will reach for continuously throughout your build it will be a basic tape measure. I have the Komelon Self Lock 25-Foot Power Tape. In fact, I have two of these. I’ve found them to be reliable not only with accurate measurements but in maintaining their shape and coiling back into the casing. I have built decks, internal walls, and our Desk PC using this tape measure and rely on it constantly.
Framing Square or Speed Square
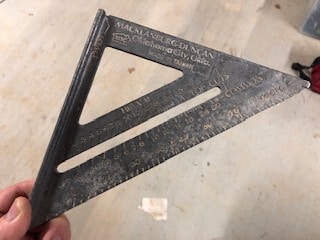
As you are cutting and assembling your build, you will constantly be checking (and double checking) to ensure that your frame is square. A simple Speed Square will serve you just fine for this but you may want to consider a Framing Square.
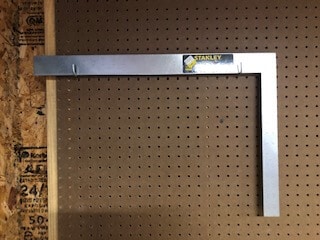
A framing square provides a longer straight edge which helps in tracing cut lines across larger pieces of wood. It is also helpful for placing not only on the inside corners to check for square but from the outside as well which occasionally comes in handy.
Electric Screwdriver / Drill
When attaching the legs to your desk you are going to want to ensure that they are secure. The best way to do this is to screw them to the bottom of the desk. For this, a simple and inexpensive battery powered screwdriver/drill is all you need. The model that I use is the WORX WX176L 20V
Dremel

If you plan to do any custom acrylic engraving, you will need a dremel kit to do it unless you have a CNC machine. Those are extremely pricey but you can do the work by hand with a

You can check the latest prices on this Dremel kit by clicking here.
Skill Saw
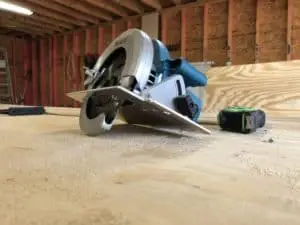
I actually spent quite a bit on my skill saw but that is because I enjoy doing wood projects around the house. Well, that’s not entirely true. The truth is my wife enjoys me doing wood projects around the house. In any case, I recommend buying a solid but inexpensive skill saw such as the SKIL 5280-01 15-Amp 7-1/4-Inch. Skil is a reliable company and this saw includes a cool laser guide which should help with precision cutting. It is one of the less expensive saws but unless you plan to build houses I suspect it will meet your needs just fine.
Wood Glue

Wood glue is very inexpensive yet indispensable when it comes to securing wood pieces together. Gorilla Wood Glue is the brand to beat these days. I recommend an 8 oz bottle as it should be more than enough for a desk PC build.
Jigsaw
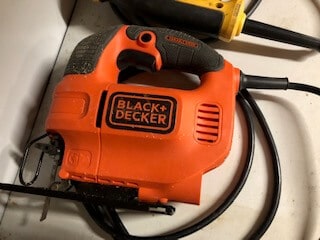
Cutting out places for the I/O port and fan holes requires you to work with a small blade. An inexpensive jig saw like the BLACK+DECKER BDEJS600C Smart Select Jig Saw is all that you need for this basic work. There are advantages to cutting holes with a hole saw but I strongly recommend the use of a drill press for this purpose if you are not going to do it with a jigsaw (see Recommended Tools below). I have twisted my wrist many times trying to cut holes with a drill and a hole saw. If you are going to do this with a hand tool I recommend tracing the hole out with a pencil and cutting it with a jigsaw.
Safety Goggles

I used to use safety glasses but dust and wood particles can still fly into your eye around the edges. These days, I use these Dewalt Safety Goggles that have a cushioned padding around the eyepiece and completely protect my eyes when cutting wood. I also use them now when working with electrical wire as I had a piece of wire snap out of a breaker box and scratch my retina resulting in pain that I can’t begin to explain and two weeks of wearing eye patches on both of my eyes, essentially rendering me blind for that whole time. It was a miserable experience but I have learned my lesson. Safety Goggles are very inexpensive. Protect yourself.
So that is my recommendations of what I believe to be the essential tools that you will need to build a Desk PC Case. Most of these are products that I actually use every day. In cases where I have purchased a more expensive brand, I’ve provided links to a less expensive version by a reputable company because I do not want you to get bogged down in the wrong decision making. This part is easy. You need some essential tools to get the job done. Some of these you may already have, some you may not. Remember that the goal is to build the Desk PC case, not over analyze the tools. These inexpensive ones from established companies will serve you just fine.
Recommended Tools
While you can completely build a desk with a computer inside it using the tools I’ve listed above, there are a few more advanced tools that I do recommend as they make the building experience a bit easier. These are especially beneficial to anyone who intends to build more than one desk PC or who wants to build other DIY projects in addition.
Table saw
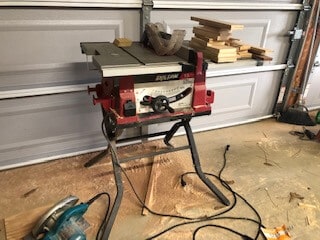
There was probably no single tool that made as significant of a difference in the quality of my builds as my first table saw purchase. It really made me appreciate how accurate, straight cuts make a project go together easier and more professional looking. This is one of the more expensive tools in my shop but I am extremely satisfied with it and use it all of the time. I purchased Skil 15 amp,
Miter saw
Where a miter saw really comes in handy is in mitering the corners of your desk so that there is no visible seam and building trim frames around cutouts in the side panels. This isn’t necessary but it does add a polished look to your finished desk. I didn’t have one when we built our Desk PC case but I’ve since purchased one because I want to add the miter corners to our next build.
The key features to look for in a miter saw for desk PC building is the ability to cut up to 6-inch pieces and 45-degree beveling. Side panels will be 4-6 inches tall depending on your build and you want to be able to cut the entire length with a single cut. However, you need the bevel feature so that you can miter the corners correctly. By beveling, I mean that the actual saw will layover at a 45-degree angle. This allows you to lay the side panel down and cut the entire corner at a perfect 45-degree angle at one time.
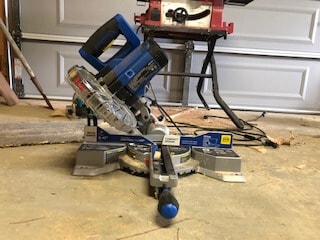
You can spend as much as you want on a miter saw and, to some degree, you get what you pay for. For these basic and essential features, however, you do not need to break the bank. Hitachi makes an excellent, yet affordable, single bevel miter saw for under $100. It’s one of the lightest miter saws in its class allowing for easy portability. Click here to check the current pricing on Amazon for the Hitachi C10FCG 15-Amp 10″ Single Bevel Compound Miter Saw.
Finish Nailer
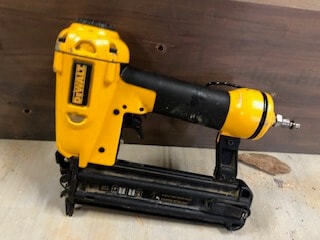
While gluing side panels on will probably be just fine, I prefer to secure them with finish nails. a 23 gauge nail is thin and the hole that it creates is barely noticeable but it provides additional strength and durability to the build. I purchased a Dewalt finish nailer when we were building our house because I intended intense use for it. If I were buying one to build a desk PC case, I would just purchase an inexpensive one like the Valu-Air H625 23 Gauge Air Pin Nailer. It handles nails up to 1 inch in length which is all that is needed. Of course, this does depend on you having an air compressor. If you do not, you may be better off selecting a battery powered finish nailer like the Ryobi One+ Plus 18 Volt Air Strike 23 Gauge 1-3/8″ Cordless Headless Pin Nailer. Ryobi has come into its own as a dependable brand for reliable cordless tools and this 23 gauge finish nailer is an excellent option. My mother-in-law purchased one when renovating her pantry and has been extremely satisfied with it. Battery powered tools do cost more than those that are powered by an air compressor but they do not require the additional expense and bulk of an air compressor either so that is a reasonable tradeoff for many.
Drill Press
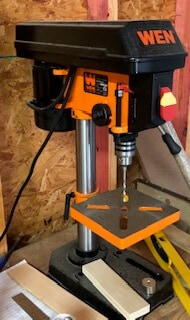
Talk about a tool that I didn’t know I needed until I had one! I used to think of a drill press as an accessory, something that was probably nice to have but not really necessary. Boy, I have I changed my tune! I use this tool constantly. During the Desk PC build, I used it to cut holes for 120mm fans in the side panels (so much easier and safer than doing it with a hand drill!) and to drill precise holes into a sheet of acrylic to mount the motherboard standoffs. You can adjust the depth so that the drill only goes part of the way through the wood and since it allows you to lock that depth you can repeat this over and over which makes it an amazing tool for countless small wood and acrylic projects. I purchased the WEN 4208 8 in. 5-Speed Drill Press from Amazon. It’s much less expensive than many others on the market and, having used it many times since it was purchased in April of 2018, I can confidently recommend this drill press for a weekend warrior’s garage. It turned out to be invaluable in building our desk PC.
Electric sander

I do not enjoy sanding. Not one bit. But I do know that if you are going to create a wood project, sanding is a necessary evil of the process. Want to know the one thing I hate worse than sanding? It’s sanding by hand. I purchased an inexpensive sander made by Black and Decker and found that it worked just fine for our Desk PC build. You can even buy sandpaper in different grits that are made specifically for it. Yes, there are more expensive sanders out there that probably offer more features but in the end, I just wanted to get this part of the process done and for that, the BLACK+DECKER BDEMS600 Mouse Detail Sander turned out to be perfect.
Clamps
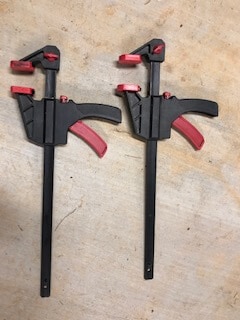
When you are gluing pieces of wood together, it is important to hold pressure on them until the glue dries. One of the most effective ways of doing this is with wood clamps. Until recently I made do with some old metal clamps that require you to turn a screw handle until the fit is tight. That is, until I purchased some of the newer “Ratchet Bar” style pressure clamps. These clamps just require that you push a release button and easily slide the clamp into place, then pull the grip a couple of times to tighten it up. They work great and are easy to apply and remove and they come with a plastic covering that prevents denting of the wood, something my metal clamps never had. I’ve become a big fan of these and would recommend them for a desk PC build as they make easy work of some of the more complicated parts of gluing in your project. TEKTON makes an 18-Inch x 2-1/2-Inch Ratchet Bar Clamp that I’ve heard really good things about. It also serves as a spreader which means the clamp can be quickly changed to maintain pressure on opposing parts and “spread” objects away from each other. (See the description on the Amazon page for visual details of this feature)
There are multiple sizes available but I’d recommend the 18-inch size or larger.
So there you have it, my recommendations on essential and recommended tools for building a desk PC. As you can see, these are not just random recommendations. I actually have these tools and use them in my own shop. I am not a master craftsman by any means but for weekend wood projects these are the actual tools that I reach for and rely on time and time again.
It may seem like a lot is required to build a desk PC but it really just comes down to a little know-how and having the right tools for the job. Remember, in the end, what you are really after is building something like this.

You just need the right tools in order to create it.
So, are you ready to get started building your very own Desk PC? Start studying up on this project now by having a look at the 15 Steps to building a desk with a computer inside it.