
When designing our first Desk PC I struggled with whether to buy pre-manufactured desk legs or to build my own. After doing some research and a little bit of soul searching, this is what I found:
Buying pre-built desk legs limit the design potential of your desk build as well as your ability to hide and manage cables for a clean finished look. Building your own desk legs not only overcomes these issues but also allows you to customize height to ensure comfort in extended periods of use.
Let’s look at just how easy it is to build your own desk legs.
Step 1 – Decide on a Design
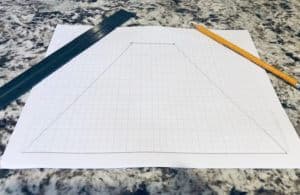
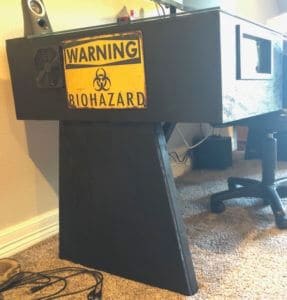
We chose a triangular shape for our desk legs. This was to provide a wider base of support and stabilization at the bottom. You can really get creative with this though depending on your woodworking experience. If your skillset is lacking like ours was, however, simpler is better.
Draw the design out on a sheet of paper (draft paper is handy for this as it allows you to estimate measurements as you go). We estimated 1 inch per square when we mapped out the design for our desk legs.
You don’t need to go out and buy graph paper either. You can download free graph paper designs from printfreegraphpaper.com (this link will open in a new window so that you don’t lose your place).
Of course, you could simply go with four straight legs like a standard table. The legs on our dining room table look nothing more than 4X4 wooden posts sanded, stained, and coated with polyurethane. There is absolutely nothing wrong with this approach and it is probably even easier than what we did. The only reason we chose the triangular side panel designs on our desk legs was for the presentation. It just looked cool to us. You do what works for you and complements your build.
Note: We did purchase some simple table legs inexpensively (more on that below) but the side panel was a necessity for stability. Had we went with only legs and no side panels we would have needed much thicker and more expensive material and ultimately I do not think it would have looked as much like a gaming desk in the end and that is what my son wanted.
Step 2 – Determine Appropriate Bracing
Regardless of which design you go with, you need to consider how those legs will be secured and braced to the desk itself. You can really go down a rabbit hole with this. There are so many advanced woodworking techniques that can not only secure the legs but add to the design itself. Unless you are a wood-crafter or aspiring to be one, I recommend going straight for the outcome on this. By that, I mean, determine the simplest way to secure the legs that will provide the level of bracing needed.
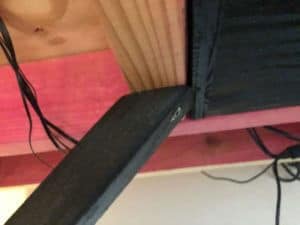
A common approach is to add blocks of wood on at least two sides of the leg secured to the underside of the desk. The leg is then secured to the two blocks to provide stability and limit movement.
Our approach was to use wood table legs that we purchased from Home Depot (you can order online and have them delivered to your door) and the accompanying mounting plates. These legs are basically just 2X2 board with a mounting screw already built into them. You mount the plate on the underside of the desk and screw these in. Since the legs are wood, we were able to cut them to the exact height we wanted. Much better than a purely pre-manufactured solution.
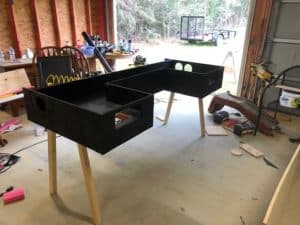
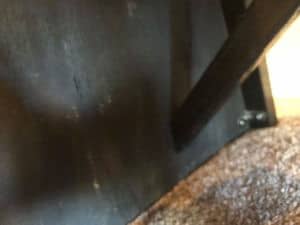
By themselves, they were quite wobbly. But when we added the triangular cut plywood panel and another 2X2 for cross-bracing it made our desk rock solid. I’m still amazed at just how sturdy the whole thing is.
But we are getting ahead of ourselves, let’s get back to the steps…
Step 3 – Measure and cut
With our design finalized and our bracing/mounting plan ready, it’s time to put the blade to the wood. I know I stress this too often in my posts but for the sake of reinforcement, double-check your measurements before you cut. This is not the time to get into a rush. Take your time and make sure your measurements are precise. Depending on the tools you have available, a skill saw and maybe a miter saw should be all that you need. Remember to always use safety and that does include eye protection when working with power tools.
Step 4 – Sand and Paint
It’s always good practice to take the time to sand your wood before you paint it. Finer grit sandpaper results in a smoother finished surface. Sometimes you will have to start with a larger grit to get out some imperfections but always finish up with a good 220 grit or better.
As for painting, plan to need multiple coats to fully cover the wood and get that finished look. To really give it a shine and ensure durability, a couple of coats water-based polyurethane can really add that finishing touch.
Step 5 – Secure Legs to Desk and You Are Done!
This is the rewarding part of your efforts when you mount your legs to the desk and stand back and reflect on what you have created. Seriously, aren’t you glad you didn’t buy some pre-built legs that didn’t really match the style and theme of your desk?
Speaking of desk themes, be sure to read Ideas for Creating a Theme for your Desk PC.
Until next time, happy building.