When my son and I first decided to build our very own computer in a desk setup, I worked out the dimensions that I planned the desk to be and rushed out and ordered our custom glass top. I was so excited to see that slick glass cornerstone of our build and wanted it ready to go the second we finished our build.
Boy, did I make a mistake!
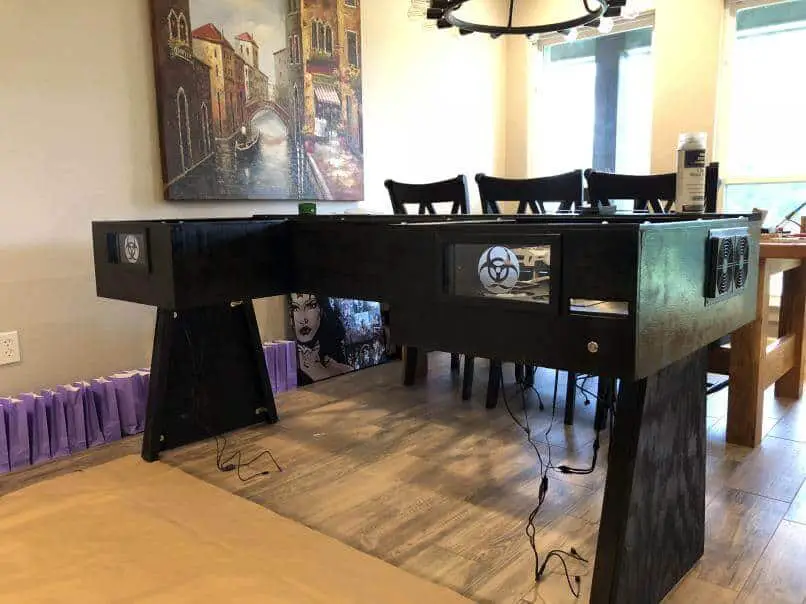
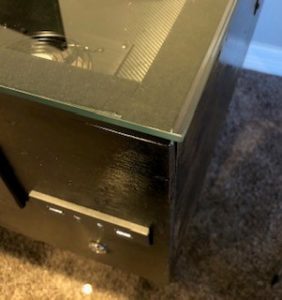
There is a distinct difference between drafting a plan and implementing it. What we originally drew out on paper matched the final design for the most part, but changes were made along the way as we identified potential problems and had eureka moments where we realized we could drastically improve the design. The end result looks like what we originally planned but it ended up being about 1/2 inch shorter in width than intended. As a result, the custom cut glass top and was specifically measured and designed to fit this particular build ended up hanging over the edge of each side about 1/4 inch. Certainly not a huge deal and it still looks great. In fact, no one would ever know by looking at it that we didn’t design it that way.
But I know. And it drives me crazy.
Anyone who has never made a mistake has never tried anything new. Albert Einstein
There is an old saying in woodworking. “Measure twice, cut once.” The idea being that you want to be 100% certain that your cut is right. When we originally measured the dimensions for our build on paper, I did not account for a decision that would come later. Instead of sitting the sides of the desk on the bottom, I decided to secure them against the sides of the bottom to help with hiding cables that would run along underneath. This was the right decision but it was figured out too late in the game. This resulted in an additional inch of width which made the glass top too short. I nearly lost my mind standing in my shop staring at that desk with the smaller than necessary glass top sitting on it for days before I finally made the radical decision to take one side apart and cut an inch off of the entire width of the desk. I ran into some problems and when it was all said and done the desk width ended up being just a bit shorter than it needed to be so now the glass overlaps a little.
When measuring for your glass, be sure to account for the side pieces and how those will be mounted. If they are going to sit on top of the main slab then the width will not change. If, however, you are going to secure them on the sides as we did, you’ll need to account for that extra width. If this feels a little confusing don’t stress. I’m working on a complete build log with step by step instructions that will be posted soon. I’m also planning a video series where I will walk you through each step of the design and building process. But you don’t need to wait for those if you are itching to start your build. Just take the time to plan everything out as best you can. Most importantly, save the glass until later. It will wait. Trust me.
So when should I order my glass top?
The best time to order your glass top will be once you have assembled the build but before you begin painting. At this point you will have the final dimensions. Until the desk is actually assembled (minus the legs which won’t effect the glass dimensions) you may be forgetting certain variables that will impact the case’s dimensions. While you are waiting on the glass to be cut, you can keep pushing the project forward with painting, fan mounting, and any special modifications that you are adding for the finishing touches such as acrylic.
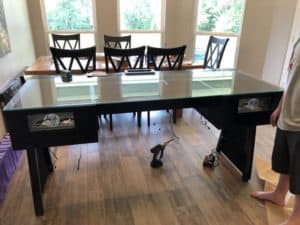
Once the glass is ready it will likely come wrapped in paper or cardboard to protect it. Since we ordered our glass way too early, we left the paper on as it sat in a corner of the shop until we had our desk assembled and sat it on the desk for a quick dry fit.

This is when we realized that our measurements were off. Had we waited until the desk was assembled, we could have had the glass cut to exactly the dimensions that we needed. Don’t be like us. Build and assemble first, then measure and order your glass.
The lesson here is simple. Don’t get ahead of yourself. Each step in the process is a critical step to completion. Work through them in order. I’ve written a step by step guide to building a Desk PC that walks you through all of phases of design and building and if you will follow that formula you will end up with a custom designed Desk PC that you can be proud of.
What if my desk isn’t square after I assemble it?
If you are not careful with your cuts, it’s possible that once you have your desk assembled you may notice that the measurements are not exactly square. By this I mean one end from back to front may be 30 inches and the other end may measure 30.5 or 31 inches. This is called being “out of square” and usually results from a lack of check and balance while cutting or a failure to accurately measure in the first place. Regardless of how it happens, if you put your desk together and realize that it is out of square this can be very frustrating. Obviously, I want you to take the time to prevent this but if you do find yourself in this situation don’t panic. You do have some options.
First, determine how far out of square you are. If the difference is 1/2 or less, you may be able to cheat the difference in the back. In other words, you’ll order the glass and position it square with the front and let the overlap fall to the back and a little to one side. If it is too far out of square, however, you will either want to determine where the bad cut is and replace it or you could request the specific dimensions be cut for the glass when it’s ordered. I want to emphasize here that I highly prefer and recommend that you correct the desk dimension error if possible. Again, the best approach is to avoid this from the beginning through proper measuring and cutting. This is not a complicated process but if you don’t take the time to get your cuts right you will find that it results in a cascading effect of one frustration after another. Take the time to plan your design out and ensure that each cut is correct and it’ll save you countless hours of frustration later.
On our next build, I’m planning to do things a little different and actually create an inlay that the glass sits in. So it will be like a large picture frame of wood with the glass sitting in it. By using this design, I can add hydraulic struts on each side that will allow us to lift the glass desktop to work on the system without completely removing the glass. If it works as planned the glass will lift and hold in place with the hydraulic struts. Pretty cool idea! But that’s next time. For now, my son is happy and thinks this is the greatest thing ever built so that will have to appease me.
Now, go build yours!