A desk PC is more than just a way to rid yourself of a big clunky PC case sitting next to your desk, it is a display for your hand-picked PC components. To really showcase those components, consider integrating various accents using acrylic.
Acrylic sheets come in various sizes, colors, and thickness and can be cut, molded or glued (cemented) to meet the customization needs of any computer build. In a traditional PC case, the uses for acrylic are somewhat limited but when you build a custom computer in a desk system it opens up a world of opportunities to mod and create using this material!
Benefits of Acrylic
Of all the modding materials available, acrylic offers some of the most enticing benefits.
- First, it is very easy to work with. Thin sheets can be scored and snapped apart easily to create custom sizes for your project.
- Second, acrylic can be etched. Using a Dremel, you can etch a design or logo into the material.
- Third is its ability to illuminate light. You’ll see a couple of examples of this below.
- The fourth benefit of working with acrylic is that it is moldable. By applying heat, you can bend a sheet to make a 90-degree corner that is free of seams.
- Finally, it can be glued together to an airtight and even watertight seal. By using a special cement liquid made especially for this purpose, the seams of acrylic are essentially welded into one. People have even made acrylic aquariums using this technique.
With so many benefits of using acrylic, you may be wondering how, exactly, you can incorporate this incredible modding material into your Desk PC project. Below are just a few ideas on how you can integrate acrylic into your build.
Component Mounting Platforms

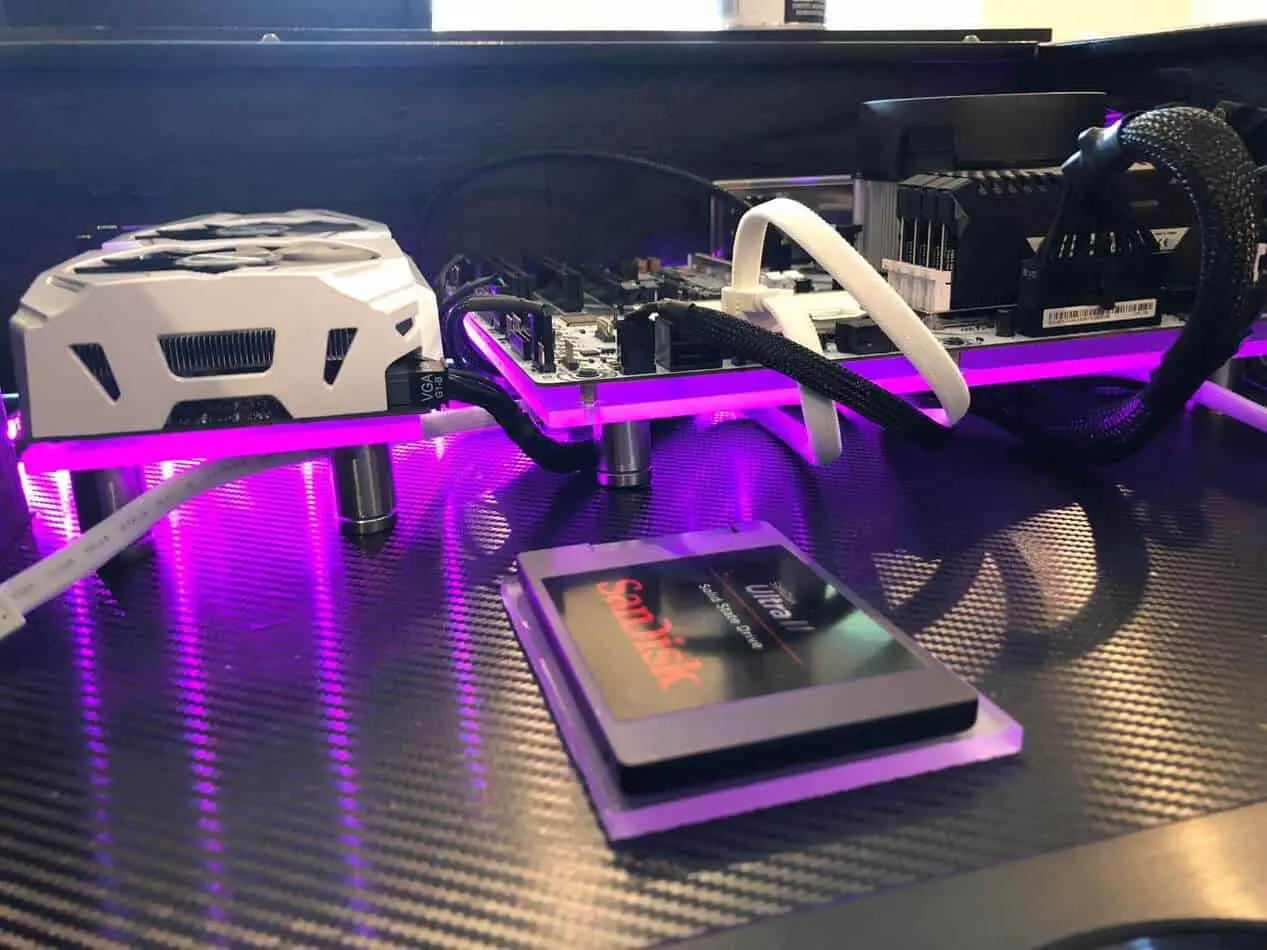
Nothing says “I love my build” like a glowing acrylic accent under your PC components. We mounted each of our components on 1/4 inch sheets of frosted acrylic and glued RGB LED strips to the back of them so that they glow with the color theme of the build. Most people use clear acrylic for this but clear only glows on the edges, the frosted sheets glow throughout with an even and consistent illumination.
Panel Inserts

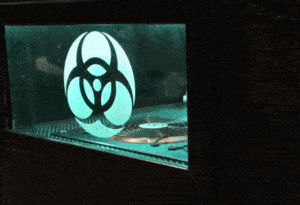
When designing our first Desk PC case, I explained to my 13-year-old son the importance of creating a theme for the build. He settled (after some debate) on a biohazard theme. We used a UV reactive green liquid cooling solution that symbolizes toxic waste running through the reservoirs and added a green desktop wallpaper with the biohazard logo to complement it. To really incorporate this theme into the desk itself, we added acrylic window panels that have the biohazard logo etched into them. By securing an RGB LED strip to the top of the window panel, it makes the logo glow in a way that cannot be adequately captured on camera but is awe-inspiring to see in person.
There are countless opportunities for this application. You could etch your name or logo into the windows for example. So as not to be stuck with a single theme forever, I designed the window panels to be removable so that we can easily switch them out to complement a new theme at his whim. Acrylic etching can be done as a DIY using a Dremel or you can order custom etched acrylic online very inexpensively.
What Else Can You Do With Acrylic In a Desk PC Build?
This is a trick question really because you are limited only by your own imagination and initiative. Since acrylic is paintable and bendable (by applying heat), opportunities for customizing your build take on entirely new possibilities. Create a shroud for cable management or a large panel that displays your gamer screenname. You could also create covers for your hard drives if wanted to hide those with a themed accent.
Whatever your creative intent, acrylic is an excellent material to consider incorporating into your build. What ideas do you have for using acrylic in your build? Would you be interested in a video demonstration of cutting, bending, welding, illuminating, or painting acrylic? Maybe all of the above? Just let me know if the comments.
Happy modding!

