For many of us who aspire to build our own custom computer in a desk setup, it can be challenging to design and assemble the most basic of desk PC cases. But in every crowd of like-minded enthusiasts, there is always one who stands out. Someone who goes beyond the basics to create something truly inspiring.
This article is part of a series of Builder’s Spotlight interviews, the purpose of which is to focus on real people who take on the challenge of building their own computer-in-a-desk setup. These individuals show that a DIY Desk PC is within the reach of anyone who is committed to being a part of the Desk PC Revolution!
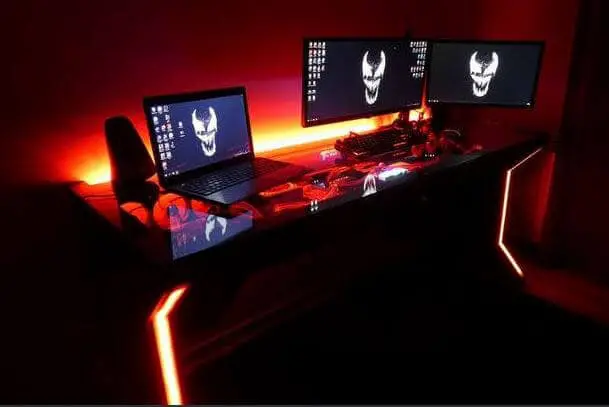
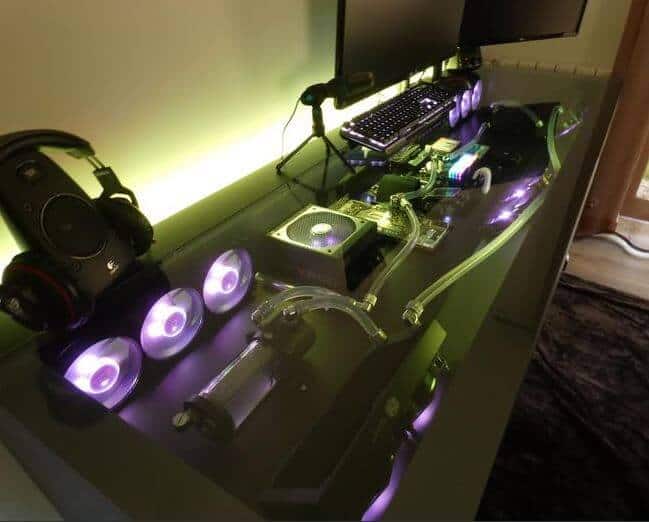
Alberto Soares, known to his YouTube fans as Tankian The Man, invested months of time and energy to create a custom desk PC build that rivals the top-of-the-line manufactured Desk PC cases.
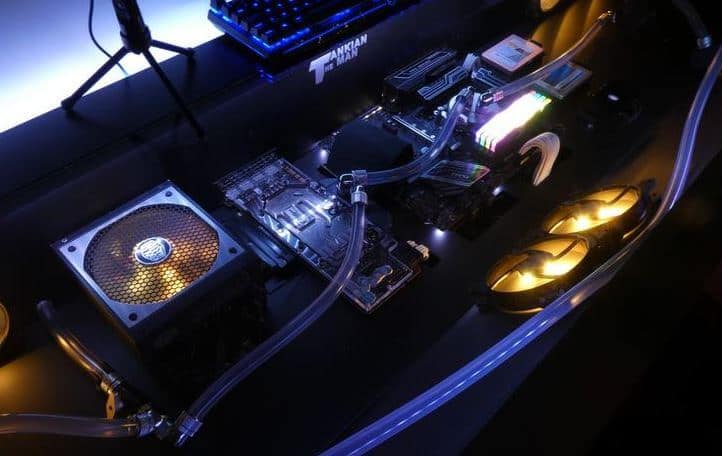
Glistening with water-cooling goodness and crammed with top-of-the-line components, this build blurs the line between DIY and professionally manufactured desk PC cases.
A build of this magnitude is not for the faint of heart. Serious effort and attention to detail were clearly required to accomplish such precise design. Incorporating both wood and metal into the framing system, Alberto has taken the DIY Desk PC revolution to a new height and raised the bar for future builders.
Let’s explore the mind of this master builder and see what insights we can glean from his experience with this project.
Alberto, what inspired you to create this build?
For a long time, I’ve been tempted to make a PC Desk build, but having a “non-mobile” PC was something that I didn´t want, so I’ve been waiting for a 2nd rig to start this idea. In the meantime, Cooler Master sent me a full rig for a previous project and after finishing it, the idea to make a desk started to make sense, and the more ideas I had the more I wanted to make one, so I ended up making it.
This build is unique compared to most DIY builds that I’ve seen in that you incorporate both wood and aluminum in the framing. Can you share your rationale on the use of aluminum and what challenges it presented?
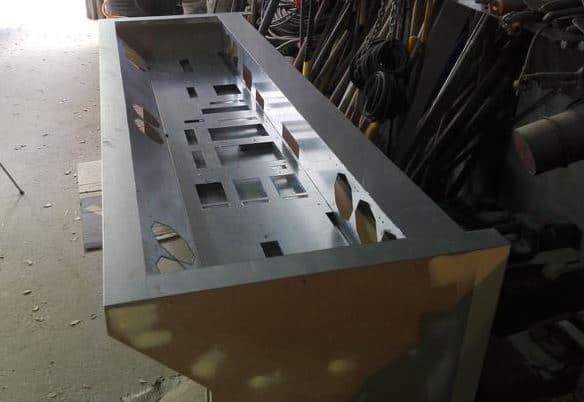
Well, I didn’t use aluminum, I used galvanized metal. I find it more resistant than aluminum and a lot more cheaper, to be honest. Anyways, I’ve been using galvanized metal for a good amount of time and since it is really strong, making the cuts was a bit challenging. I wanted everything perfect so any mistake could mean a back step in this project.
Can you briefly walk us through the build process for this build?
Well, first of all, I made a hand-draw to note some ideas. Next, I made a 3D model in “SketchUp” to make sure all the measures and ideas worked for the real world. After having all the planning in 3D done I started to search for the best locations to get all of the materials that I needed, but since isn’t my first project I already have some “spots” with good pricing to look at.
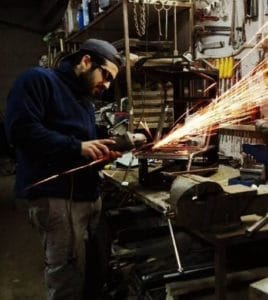
Then the building phase starts, the part I like the most (hahaha). In this particular project, it was a bit challenging because of the size of the desk. The raw build with wood and galvanized metal was pretty straight
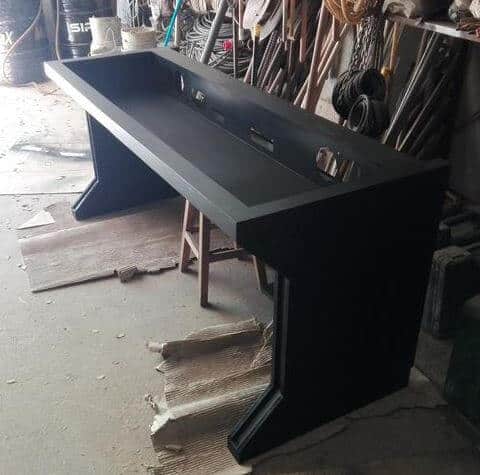
The most time-consuming part, and “less fun”, was the preparation for the primer. It took me a lot of time to sand all of the filling putty and to make all the edges were perfect. But after painting, it was more than worth it. I used car related products, like putty, primer, water base coat and clear coat for this project, since my daily job is painting cars.
After getting everything done in the workshop, mounting all the components was a little challenging too, since it was the first time I mounted everything together. In the end, everything matched as planned!
In overall, the project went really well. I was really motivated to make something special, so even in dealing with some of the “hardest” things, I always solved them pretty quickly.
Earlier, you mentioned using 3D software to mark up your design but that you initially used pen and paper. Is that a standard process for your design workflow?
I always use paper to draw my ideas and take some notes. I’ve studied Visual Arts and definitely, that helps a lot when it comes to putting your ideas in a visual perspective. When it comes to having all the measures correct, 3D software definitely comes in handy, I’ve been using 3D SketchUp for a couple years and it works just fine, I find it very easy to use.
Did the final build end up matching the original conception or were their adjustments made during the build process?
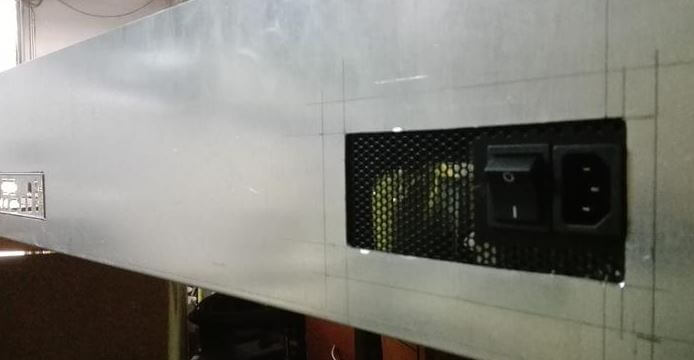
Yes, there are at least two changes I decided to apply to give the desk a bit more resistance. For example, on the back part where the holder for monitors attaches, there are two planks instead of one to provide better stability. In the top of that, I had to trim in galvanized metal for the same effect
Sometimes you don’t realize you need these type of changes in the 3D software and you have to improvise to make sure that everything holds up for a good period of time. I mean, in the end, this is a heavy piece of furniture that had to handle a good amount of weight.
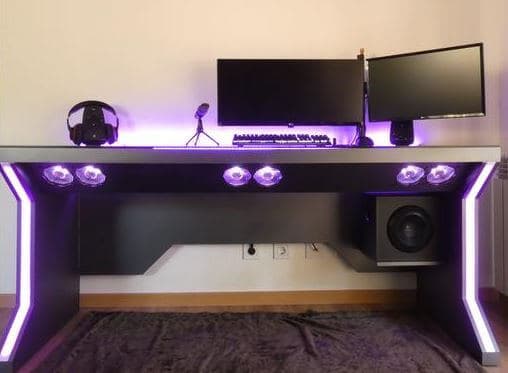
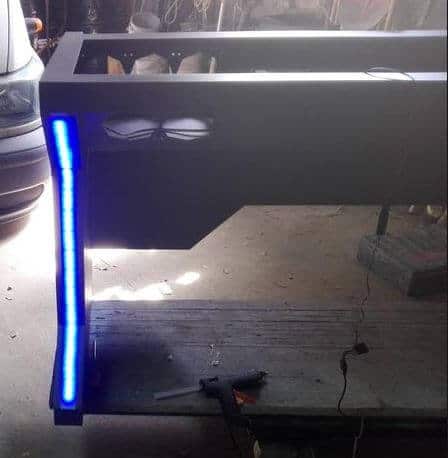
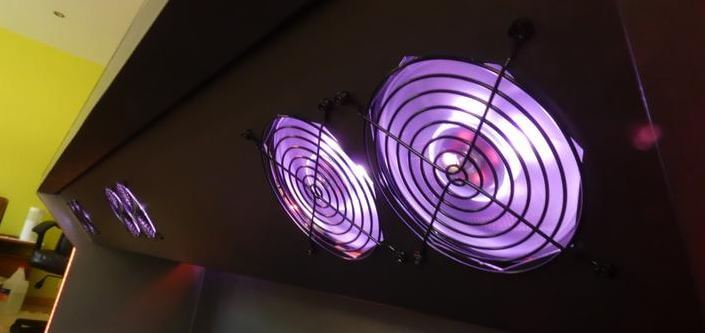
Those desk legs are epic! How did you come up with the idea of building LED lighting into the legs and what did you use as a diffuser to cover them?
The legs are one of those things that I started to think about at the beginning of the planning phase. I wanted to make sure that the furniture could be connected to the “PC” and vice versa. In the end, this is what I came up with.
I used white acrylic with white vinyl on top of it.
Let’s talk ergonomics for a moment. One of the challenges that desk PCs present is forcing the user into an awkward sitting position due to the thickness of the desk. I see you approached this aspect by having the front panel of the desk recess back at an angle. This looks like it probably helps to allow you to sit comfortably but having had the opportunity to use the desk for a while, can you verify whether this design is effective for comfortable knee and arm placement while working?
Well having a PC Desk like this definitely has is “ups and downs”, but the only thing you can’t do with this type of project is “crossing” your legs in all the ways possible. I mean I find myself doing it, but of course, you have some limitation when you have your belly close to the front of the desk.
Anyways, for the last seven to eight months of using it, I haven’t found anything that makes me want to go back to a regular pc case.
I believe you started this project without any sponsors. Did you end up with any before the project was over?
I started this project indeed without any sponsors. even though I had a small contract with Cooler Master Portugal for a possible sponsorship on this, I didn’t know it for sure. I came from a project with them a couple months before for the “HALF in HALF” mod.
Anyways, only when I started to mount the LED’s and start testing all the components to assemble did Cooler Master Portugal confirm their support. They sent me a Cooler Master Maker Kit 240 for the desk. After that, I tried to reach out to Cooler Master international to get another reservoir and radiator to be able to match both sides of the desk with the cooling parts, something that I received 1 week after the deadline for the Case Mod World Series.
In the end, everything came together really well, even though I had already bought some cooling parts, it turned out to be even better with the parts I received from Cooler Master.
Can you give us some insight into the airflow strategy for this desk?
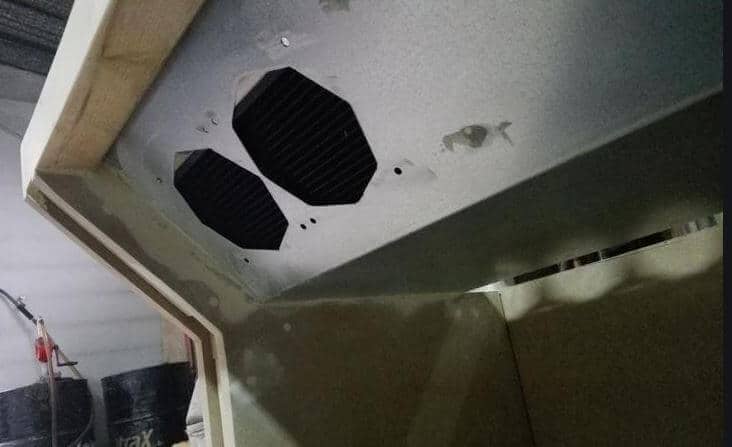
The strategy was to have the same amount of fans pulling-in and the same amount pulling-out. So basically, I have 6 intake fans in the front, 2 in the right and left side for the radiators and 2 in the middle.
In the back I have 7 outtakes (counting the PSU fan), 3 in each side, exhausting all the air from the inside.
Just wanna point out that the middle fans basically provide cross air flow for both sides making sure that all of the “
What tools were required for this build?
Electric hand saw
Sander with vacuum
Air compressor
Screwdriver
Grinder
Paint Gun
This is what I think is necessary to make
something like I did.
Based on this experience, can you offer any guidance or suggestions for aspiring builders who are wanting to build their own desk PC case?
I always recommend having a good planning phase. If you take your time to study what you wanna do, and all the possible problems you can face before the building phase, you will find it easier to finish your project.
Finally, if you were to build this desk or another DIY Desk PC case in the future, what changes would you make to the design or materials used?
I’m definitely doing another one, I don’t know when but I want to. Changes will happen. Right now, I want to improve cable routing and make it easy to mount the components, for this build I had to place the graphics card in a horizontal position to fill up space, in the future I’m definitely placing it directly in the motherboard.
PC SPECS:
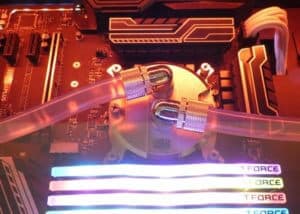
- Processor – Intel i5 7600k Water Cooled
- Motherboard – MSI z270 Pro SLI
- RAM – 32Gb Team Group
- Graphics Card – 1080ti Water Cooled
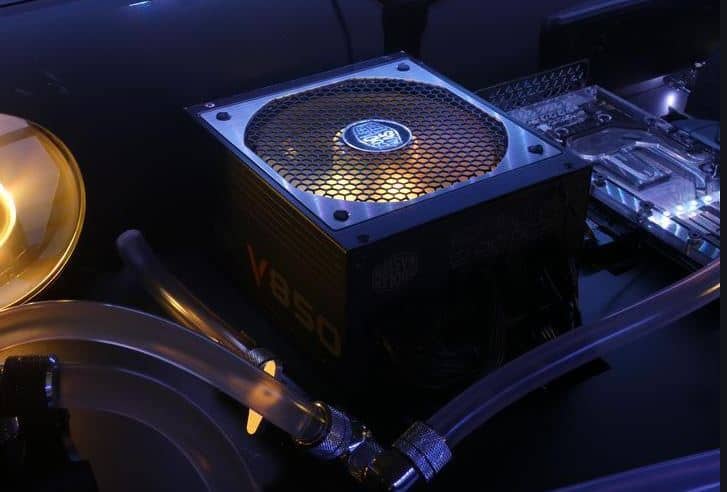
- Power Supply -Cooler Master V850
- Fans:
- 2x Cooler Master Maker’s 240mm
- 8x Cooler Master Master Flow Fans
- 4x Cooler Master Pressure Fans
About The Builder
I’m Alberto Soares, I’ve studied Visual Arts and have been working as a Car Painter for the last 4 years. For the last 8 years I’ve been trying to do PC Modding has a hobby but only in the last 2 years I started to take this a little more seriously by starting my “brand” called “Tankian the Man”, the idea is basically to share my work and hopefully help someone with the building vlogs I do.
This year I will be doing live streams in my workshop, and hopefully in this month a new project with a new sponsor on the way.
If you wanna follow my work you can find me on Instagram by the name: @tankias and on Facebook: www.facebook.com/tankiantheman
Special thanks to Alberto for sharing his build experience on this amazing DIY project. You can view all of his YouTube videos and subscribe to see future projects at his YouTube Channel, Tankian The Man.